Orbital Sand: How to Apply Orbital Sand to a Car
The process of applying orbital sand to a car can seem like an intimidating and complicated task. This is because the only way that you would know how to do it is by watching someone else do it, or reading about it in a book. The good news is that there are plenty of different ways to apply orbital sand, so if one doesn't work for you then there's always another option! In this blog post we will discuss four easy methods for applying orbital sand.
What is orbital sand?
Orbital Sand consists mainly of aluminum oxide powder with smaller amounts of garnet and silica mixed in as well. It has very small grains (measuring approximately 0-15 micrometers) which makes them perfect for polishing and sanding.
This provides a useful grit that is very effective at removing scratches, swirls, oxidation or other paint defects. Be sure to use an orbital sander when applying the sand since rotary sanders will create heat which can damage your vehicle's clear coat.
How to Apply Orbital Sound in a Car?
The process of applying orbital sand to a car can seem like an intimidating and complicated task. This is because the only way that you would know how to do it is by watching someone else do it, or reading about it in a book. The good news is that there are plenty of different ways to apply orbital sand, so if one doesn't work for you then there's always another option! In this blog post we will discuss four easy methods for applying orbital sand.
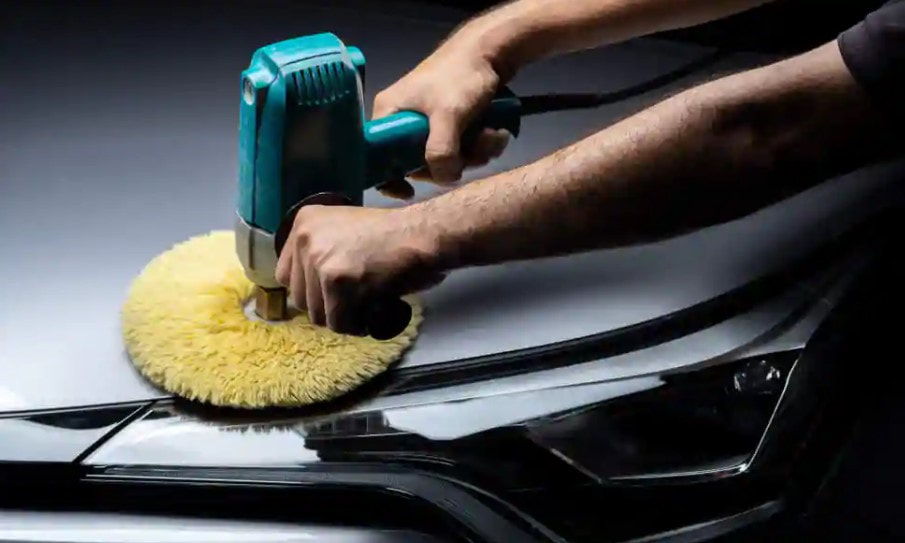
It's always best to start with "rough" sand paper because it has coarser grains than fine grain papers. There are two main types of orbitals: hook-and-loop discs (such as those manufactured by Norton) and velcro pads (manufactured by Lake Country). The only real difference between them is that one type has a fabric like material sewn onto the pad while the other type has small rubber dots. We recommend using Lake Country velcro pads because they are easier to clean and last longer than hook-and-loop discs (although both will work fine).
Follow these steps for applying orbital sand:
First, make sure your vehicle is free of any dirt or grime that might scratch it during the polishing process. This can be done with soap and water along with an old terry cloth towel or microfiber rag you don't mind getting dirty.
Next, cover all windows and sensitive areas on your car such as mirrors, door handles etc. Since this task requires lots of moving around we suggest putting down some plastic sheeting over anything underneath the car that you don't want to get dirty.
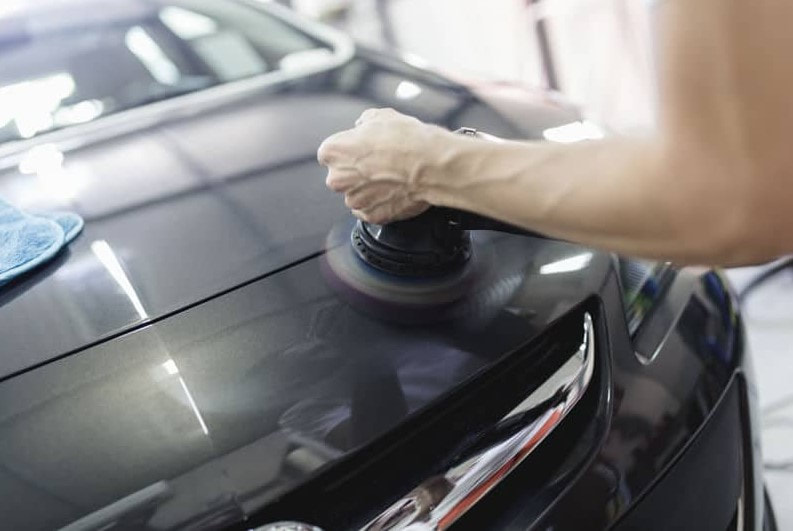
Third, break out your Orbital Sander and put on a pair of safety glasses since these devices come with high speed rotating pads. Apply the sanding discs (prepared according to steps two) onto the sander's Velcro backing plate and tighten them down using the built in screw mechanism. This is the perfect choice on air orbital sander.
Make sure they're nice and snug so there is little chance for movement during polishing. Next we recommend marking off an area which begins just outside your initial starting point until it extends beyond where you will be working near tires or wheel wells etc.
This line can serve as a guide while orbital sanding but should not touch any part of your vehicle because this could cause damage! Important: If at any point during orbital sanding the pad should stop spinning, shut down your sander immediately!
This is likely because something has gotten stuck in between the velcro discs (i.e., small pebbles or other debris). If this occurs simply open up your sander and remove whatever got stuck to allow it to continue spinning freely again.
Fourth, before you start polishing, verify that your speed setting on your Orbital Sander is turned all the way down since we will be applying pressure while using these devices which can cause them to heat up quickly. Start with an area near one of the front tires where it's easy for you to move around without having too many obstacles right underfoot such as curbs etc.
Now turn on the machine and let it run with no pressure applied to the pad until you see all debris flying off your vehicle. Once you've done this move on to another area and repeat the process until you have sanded all sensitive areas including door handles, mirrors etc.
Fifth, now that we're satisfied with how our car looks (i.e., swirls are gone) its time for fine grain paper which is simply less coarse than rough sanding paper since it removes scratches better but takes more time. Follow steps one through four again making sure not to overlap any of your orbital sanding so there is always a clean line between them where damage won't occur!
Finally, once every part of your vehicle has been polished using fine grain paper, unplug your Orbital Sander and remove the sanding discs. You can do this by pushing down on the Velcro backing plate to release it from your sander so you have a free hand while removing them.
Clean off any residue with soap and water, then let dry completely before applying wax or sealant which will help protect your paint job for months if done correctly! Remember that orbital polishing is not an exact science since there are many variables at play such as how dirty the surface was when we started etc. If during your first attempt nothing seems to be happening don't give up hope because over time you'll see results in no time flat (pun intended)!
Also remember that different types of cars will require longer amounts of time between each step as well as higher speeds so be sure to check your owner's manual for more information.
In the end, orbital sanding is a great way of removing swirl marks from paint but it does take time and patience before you can reap its benefits!
Orbital Sand consists mainly of aluminum oxide powder with smaller amounts of garnet and silica mixed in as well. It has very small grains (measuring approximately 0-15 micrometers) which makes them perfect for polishing and sanding.
This provides a useful grit that is very effective at removing scratches, swirls, oxidation or other paint defects. Be sure to use an orbital sander when applying the sand since rotary sanders will create heat which can damage your vehicle's clear coat.
How to Apply Orbital Sound in a Car?
The process of applying orbital sand to a car can seem like an intimidating and complicated task. This is because the only way that you would know how to do it is by watching someone else do it, or reading about it in a book. The good news is that there are plenty of different ways to apply orbital sand, so if one doesn't work for you then there's always another option! In this blog post we will discuss four easy methods for applying orbital sand.
It's always best to start with "rough" sand paper because it has coarser grains than fine grain papers. There are two main types of orbitals: hook-and-loop discs (such as those manufactured by Norton) and velcro pads (manufactured by Lake Country). The only real difference between them is that one type has a fabric like material sewn onto the pad while the other type has small rubber dots. We recommend using Lake Country velcro pads because they are easier to clean and last longer than hook-and-loop discs (although both will work fine).
Follow these steps for applying orbital sand:
First, make sure your vehicle is free of any dirt or grime that might scratch it during the polishing process. This can be done with soap and water along with an old terry cloth towel or microfiber rag you don't mind getting dirty.
Next, cover all windows and sensitive areas on your car such as mirrors, door handles etc. Since this task requires lots of moving around we suggest putting down some plastic sheeting over anything underneath the car that you don't want to get dirty.
Third, break out your Orbital Sander and put on a pair of safety glasses since these devices come with high speed rotating pads. Apply the sanding discs (prepared according to steps two) onto the sander's Velcro backing plate and tighten them down using the built in screw mechanism. This is the perfect choice on air orbital sander.
Make sure they're nice and snug so there is little chance for movement during polishing. Next we recommend marking off an area which begins just outside your initial starting point until it extends beyond where you will be working near tires or wheel wells etc.
This line can serve as a guide while orbital sanding but should not touch any part of your vehicle because this could cause damage! Important: If at any point during orbital sanding the pad should stop spinning, shut down your sander immediately!
This is likely because something has gotten stuck in between the velcro discs (i.e., small pebbles or other debris). If this occurs simply open up your sander and remove whatever got stuck to allow it to continue spinning freely again.
Fourth, before you start polishing, verify that your speed setting on your Orbital Sander is turned all the way down since we will be applying pressure while using these devices which can cause them to heat up quickly. Start with an area near one of the front tires where it's easy for you to move around without having too many obstacles right underfoot such as curbs etc.
Now turn on the machine and let it run with no pressure applied to the pad until you see all debris flying off your vehicle. Once you've done this move on to another area and repeat the process until you have sanded all sensitive areas including door handles, mirrors etc.
Fifth, now that we're satisfied with how our car looks (i.e., swirls are gone) its time for fine grain paper which is simply less coarse than rough sanding paper since it removes scratches better but takes more time. Follow steps one through four again making sure not to overlap any of your orbital sanding so there is always a clean line between them where damage won't occur!
Finally, once every part of your vehicle has been polished using fine grain paper, unplug your Orbital Sander and remove the sanding discs. You can do this by pushing down on the Velcro backing plate to release it from your sander so you have a free hand while removing them.
Clean off any residue with soap and water, then let dry completely before applying wax or sealant which will help protect your paint job for months if done correctly! Remember that orbital polishing is not an exact science since there are many variables at play such as how dirty the surface was when we started etc. If during your first attempt nothing seems to be happening don't give up hope because over time you'll see results in no time flat (pun intended)!
Also remember that different types of cars will require longer amounts of time between each step as well as higher speeds so be sure to check your owner's manual for more information.
In the end, orbital sanding is a great way of removing swirl marks from paint but it does take time and patience before you can reap its benefits!
Last Thought
Orbital Sand is a revolutionary new product that has been designed to make it easier for you to clean your car. The innovative idea behind this product is the application of orbital sand. It does not require any wiping or rubbing, and instead uses an orbital action which makes dirt disappear in no time at all!
However, before using it on your car, you should first read the instructions carefully. This way you will be able to use Orbital Sand effectively and save yourself from frustration later on when your vehicle starts looking dirty again because of improper usage.
